Feeds:
Posts
Comments

Posts Tagged ‘Crafts’

I’ve done some internet research, yet still haven’t quite figured out who came up with the genius baby shower gift known as The Diaper Cake.  The closest inventor I have found is the website Baby Bingo, who’s claim to fame is the provider of Charlotte’s gift to Miranda on Sluts in the City.

I myself have never watched the show (seriously.) and came across the idea while searching for creative gifts to give a good friend of mine who was having her first child.  As a crafty girl, I could not just buy clothes and toys to be forgotten about days later as she wrote out her thank you notes (I made those too).  I needed to come up with something practical, memorable, and fantastic that would earn me accolades amongst my friends.  Hence, the Awesome Diaper Cake was created.

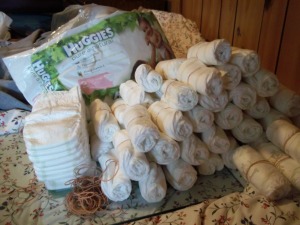
It starts out simple enough.  I like to use size 2 diapers, because then the parents can enjoy my creation for a few months before having to destroy it with poo.  First step is to roll the diapers tightly, opening in the middle, and secure with a rubber band.

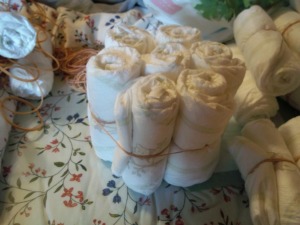
Second, the diapers need to fastened in a circle as tightly as possible.  I do this with various sized large rubber bands until I’m sure they’re not going to pop out.

Rolled Diapers

I went for Huggies Eco Friendly Cotton

The beginning of a layer

The beginning of a layer

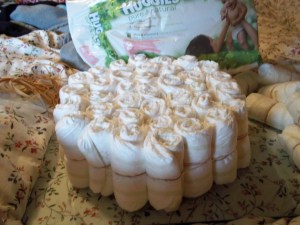
Bottom layer complete

Tightly secured bottom layer

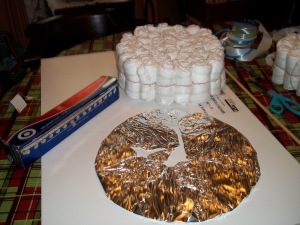
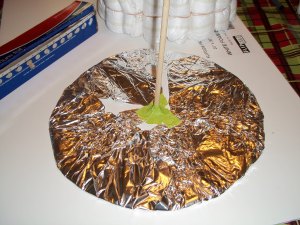
Create a base for the cake using a heavy cardboard.  I’ve been known to be cheap and use a pizza box covered in tin foil.  Foam core also works well.  I like to do this after I have created the bottom layer when I know how large of a cake I will have.

Cake base

Cake base (foam core covered in tin foil = classy)

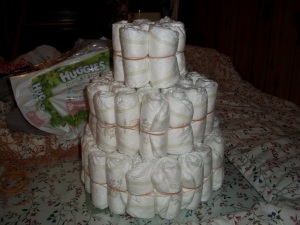
Your cake can be as wide, skinny, tall or short as you’d like it.  I find three fat layers usually makes an impressive size.  Make your layers just as you did the first, decreasing in girth as you go.  Don’t worry about evenly distributing diapers and making exact circles or you will drive yourself insane.

3 Tiers

This 3 tiered cake was made with 72 diapers

Now for the hardest part: getting the layers attached to the base.  I like to use a wooden dowel purchased from the craft store, found in the wood crafting section.  A good dose of Duct Tape will conect it to the base.  A word to the wise: Make sure to remove the stickiness of the tape’s edges or else you will get ripped, unusable diapers.  My trick is to cover my hand in baby powder and give the tape a good hand job.  And who cares if you get a little Johnson & Johnson on the diapers?

Dowel taped to base

Wooden dowel taped to the base

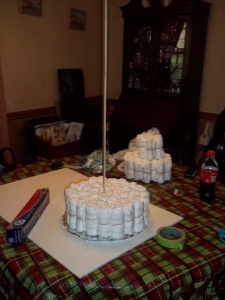
Find the middle of your bottom layer and carefully lower it onto the stick.  This might require some dis assembly or movement of rubber bands.  It’s not an exact science.  As with everything, the first time is always the hardest.  You’ll put the remaining layers on like a pro.

Assemble layer 1 on base

This is the after photo. It all fell apart on me twice.

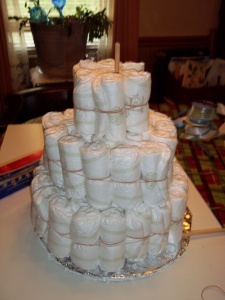
At this point, I usually have to cut the dowel to size.  I’ve used everything from scissors to gardening shears, even branch clippers, to complete this task.  The end doesn’t have to be clean because you’re going to cover it.  If you’re worried, you could always sand it down or cover it with more Duct Tape.

Dowel cut to size

Make sure you leave enough at the top for decoration.

The best part of the creative process is the decoration.  The possibilities are endless!  If you’re having a hard time getting started, you can cheat and Google “diaper cakes” for ideas.
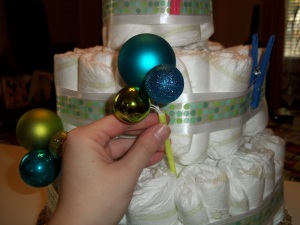
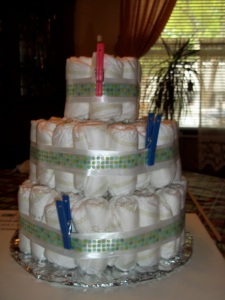
Adding the ribbon

I added a little ribbon with the help of clothes pins until the glue dries.

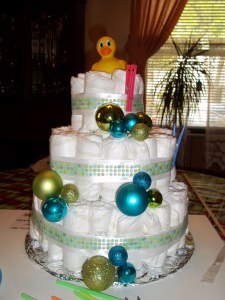
Adding decoration

If you're adding anything with wire, cut a straw in half and use it to slide between the diapers so you don't rip them.

Almost done

Had to cut a hole in the rubber duck for the dowel, but he's still usable.

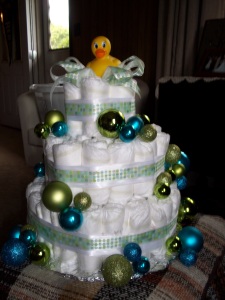
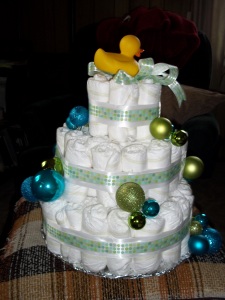
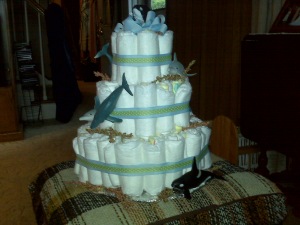
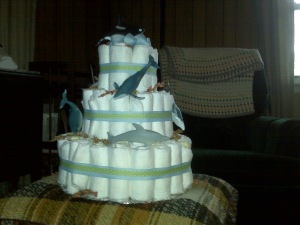
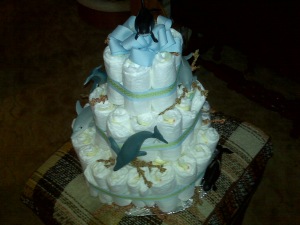
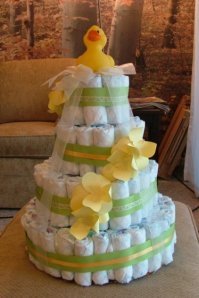
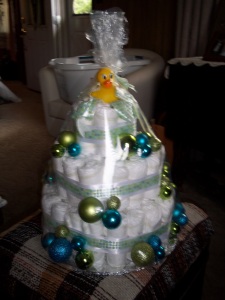
Below is my current completed cake and two of my previous.  Whatever you decide, the receiver will adore your thoughtfulness.  Enjoy the praise from your fellow shower goers!  You deserve it!

Completed front

Completed front...

Completed back

Completed back!

Stefanie's diaper cake

Stefanie's diaper cake side...

Stefanie's diaper cake side 2

Stefanie's diaper cake side 2...

Stefanie's cake top

Stefanie's cake top!

Karen's diaper cake

Karen's diaper cake

Materials list:

  • Foam Core or heavy cardboard for base
  • Wooden dowel, stable enough to hold the layers but thin enough to cut
  • Scissors or clippers to cut through the dowel
  • A bag of multiple sized rubber bands
  • Diapers, preferably size 2 (I like the ones without designs so as not to distract from the decorations)
  • Ribbon
  • Decorations
  • “Cake” topper such as a rubber duckie or stuffed animal

Optional:

  • Shrink wrap bag
Wrapped in shrink wrap

Packaged and ready for transport.

Read Full Post »

Hand Embroidered Baby Bibs

My cousin and his wife are expecting their first bundle of joy in July. Since my mom has confiscated my usual baby shower gift, the awesome diaper cake, as her own, I have been forced to one up myself with something even more boss.

I went to Michael’s in search of supplies for a completely different project and came across the cutest book I have ever seen: Aranzi Aronzo’s Baby Stuff.

I love arugumi, but I’ve been unable to knit lately.  Seems I’ve strained my left wrist after practicing “Through the Fire and Flames” on Guitar Hero too much and now I can only knit for half an hour before I get a shooting pain up my arm.  Small price to pay for 80% on hard.

Aronzo’s Baby Stuff is chock full of great ideas that are arugumi inspired and can mostly be made in a day.  For this occasion, I settled on two items: terrycloth baby bibs and drool towels.  First up are the bibs.

For four hand embroidered bibs and four drool towels, this project comes in right at the $25-30 price range I like to spend.  The only thing I needed to purchase was the terrycloth ($5.99/yard at JoAnn Fabrics) and the stabilizer ($5.99).  I rifled through my leftover supplies from previous projects for the embroidery floss (usually $0.39 to $0.59 at the craft store) and tracing paper is a staple in my craft box.  I also suggest if you want to do this project, you should probably get carbon paper for tracing the patterns on the fabric.  I was cheap and skipped that step.

The impatient person that I am, I didn’t read the directions before sitting down to start my crafting.  The patterns in the book are not to scale and need to be copied at 140% their printed size.  Instead, I chose to do a little simple math and viola!

The rotary cutter is the best quilter’s tool ever!

I cut the neck hole out of tracing paper first so I didn’t waste fabric.

I’m sure it’s not the same size as the pattern in the book, but it does the trick.

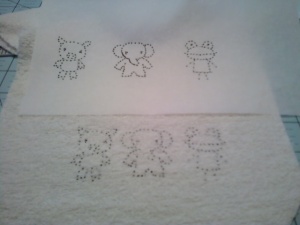
After the annoying part of cutting everything to size, the fun could begin.  Here is where I strayed from the instructions.  This bib pattern was to be embroidered with some creepy looking smiley faces, but I chose to use the animal patterns they provided for a different project.  I traced them out of the book and transferred the pattern to the terrycloth by punching holes through the tracing paper with a fine tipped marker.


Tracing the pattern from the book

Characters transferred to fabric.  Make sure they’re in the middle and evenly spaced!
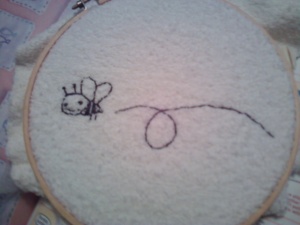
The instructions don’t mention using a stabilizer, but I highly recommended using it whenever doing embroidery.  If you’re a tight stitcher like me, it is a great way to make the fabric stiffer and avoid gaping holes from pulling too tight.  I used a basic back stitch and french knots to outline the characters.  After experimenting, I found that three or four embroidery threads with long stitches work best on terrycloth.

Pig, Elephant & Froggie

The bumble bee is my favorite

All that’s left is to sew them together and add Velcro to hook around the neck.  I bought green terrycloth and will probably make two more along with the adorable bunny shaped drool cloths.  I am very happy with the way they turned out and they will make an excellent gift.

In case you were curious, here is an example of one of my awesome diaper cakes.  You will be blessed with instructions in a future post.  However, if we ever attend the same baby shower and you steal my thunder, I will kick your ass.

Read Full Post »